If you have a sloped area in your yard that needs some TLC, laying sod can be a great solution. Sod not only provides instant greenery but also helps prevent erosion on slopes. However, laying sod on a slope requires some extra care and consideration to ensure proper establishment and long-term success. In this article, we’ll explore the steps to lay sod on a slope and share some tips for a successful installation.
1. Prepare the Slope
Before laying sod, it’s essential to prepare the slope properly. Here’s what you need to do:
- Clear the area: Remove any existing vegetation, rocks, or debris from the slope. This will provide a clean surface for the sod to take root.
- Grade the slope: Smooth out the slope as much as possible using a rake or shovel. This step helps to create an even surface and allows the sod to settle uniformly.
- Address drainage: Slopes can sometimes have drainage issues. If you notice water pooling on the slope or flowing too quickly, consider incorporating drainage solutions like trenches or swales. This will help prevent water from damaging the sod’s root system.
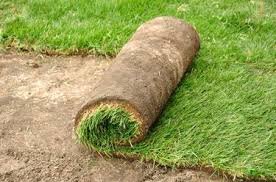
2. Choose the Right Sod
Selecting the appropriate type of sod is crucial when working on a slope. Opt for a sod variety that has strong root development, excellent erosion control capabilities, and is suitable for your climate. Consult with Palm Beach Tree & Landscape can provide valuable guidance on choosing the right sod for your slope.
3. Install the Sod
Now that your slope is prepared and the sod is chosen, it’s time to lay the sod. Here’s how:
- Start at the bottom: Begin at the bottom of the slope and work your way up. This prevents the sod from sliding down the slope during installation.
- Stagger the seams: Place the sod pieces in a staggered pattern, much like laying bricks. This interlocking technique helps prevent gaps and promotes a more uniform appearance.
- Press and secure: After laying each piece of sod, gently press it into the soil to ensure good soil-to-sod contact. Use landscape stakes or biodegradable netting to secure the sod on steeper slopes.
- Water thoroughly: Immediately after installing the sod, water it thoroughly to help settle the soil and encourage root establishment. Be careful not to overwater, as excess water can lead to runoff.
4. Maintain Proper Care
Maintaining proper care is essential for the success of your newly laid sod on a slope. Here are some maintenance tips:
- Watering: Regularly water the sod to keep it moist, especially during the first few weeks. Be mindful of the slope’s drainage characteristics and adjust the watering schedule accordingly.
- Mowing: Once the sod has established roots, you can begin mowing. Use a sharp blade and maintain an appropriate mowing height to ensure healthy growth.
- Fertilizing: Apply a slow-release fertilizer according to the recommended schedule for your specific sod type. Consult with Palm Beach Tree & Landscape for guidance on the best fertilizer for your slope.
By following these steps and maintaining proper care, you can successfully lay sod on a slope and transform it into a beautiful and lush landscape. If you need professional assistance or more information, consider reaching out to Palm Beach Tree & Landscape. Their expertise and services can help you achieve the landscape of your dreams.


Leave a Reply